Note: In the following steps, we use Es File Explorer app, this app can be installed using the Google Play Store.
For more details to install Es File Explorer follow this link Root configuration using ES-Explorer
How do you install our app in Android player (TV box)?
-
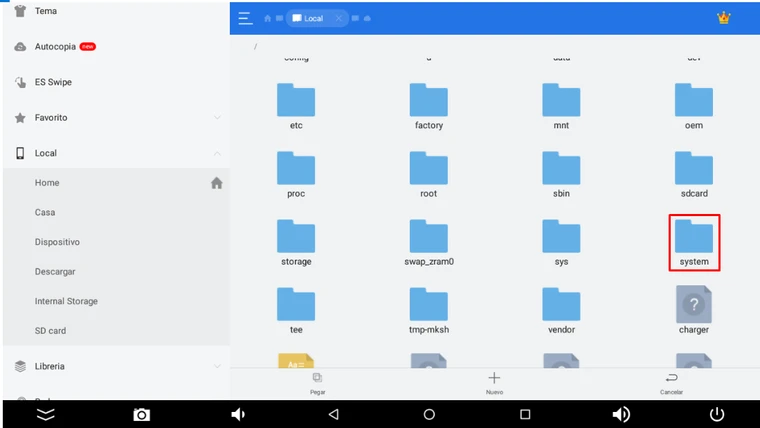
First, go to the “system” directory inside the Android file system.
-
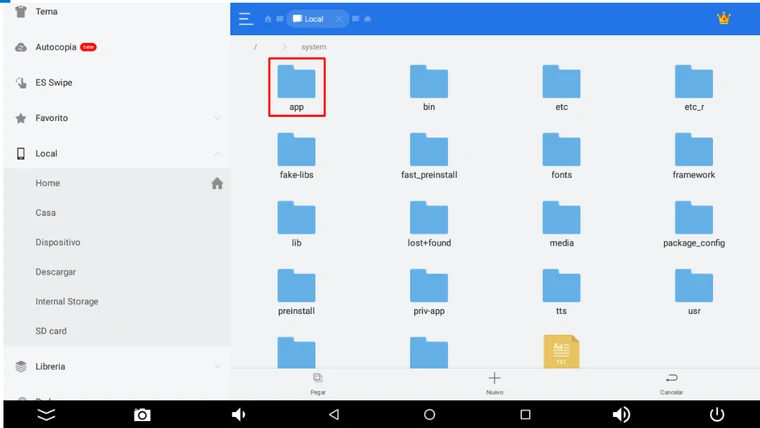
Then, go to the “app” directory inside “system” directory.
-
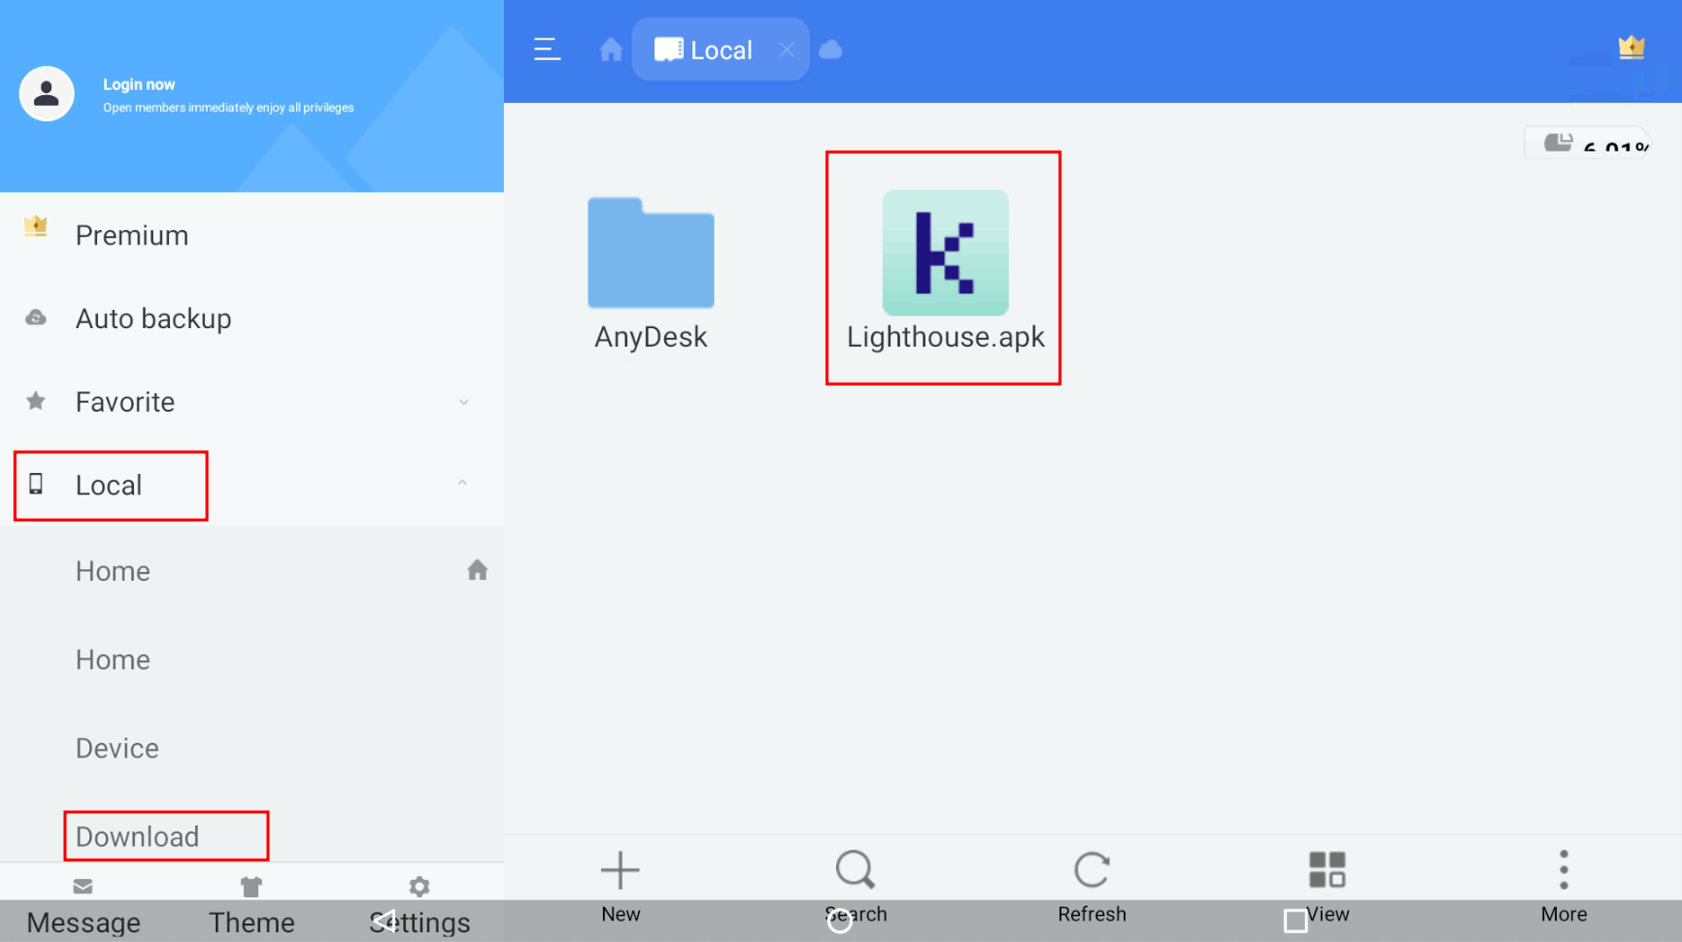
Once in the directory “system/app”, you should paste “Lighthouse.apk” previously downloaded using the link https://bit.ly/tklight. Is very important no name the file as indicated before.
-
Now that you have the “.apk” file inside the root folder, is necessary to reboot the TV Box for the changes to be applied and the application to be installed.
-
When the reboot finished, the application should be lunched automatically.
-
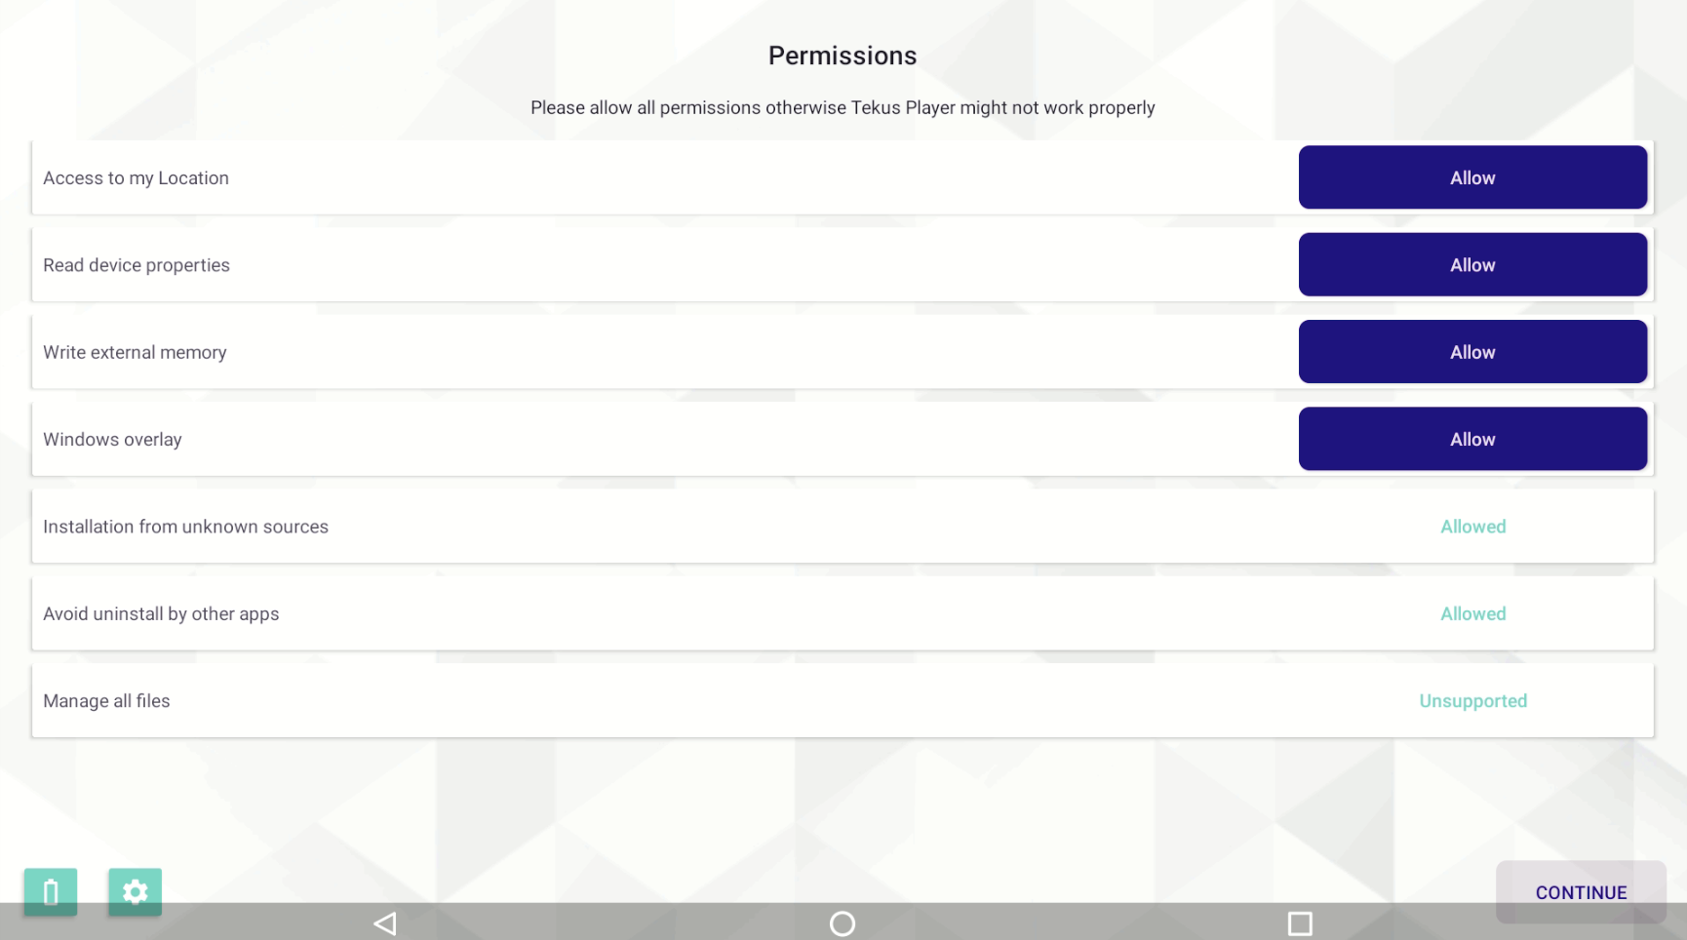
Then, a Tekus app window requesting permissions should be opened, you must select Allow in each of them, when done the permission button will appear as granted or unsupported, go to the next step by clicking Continue.
Congratulations! 🥳
On the screen below, you will see your alphanumeric code.
-20250127-131901.png?cb=d3ee7bfce0eab71c3d60750743b8ede6)
Now, with this code you can register your device in tekus web platform.
Register your device is very easy! 🙉
Alphanumeric code registration
-
You must access to the web platform https://test.tekus.co and then log in with the credentials provided by tekus.
-
Then, in the left menu, you must click on the orange button ➕ and select Register screen.
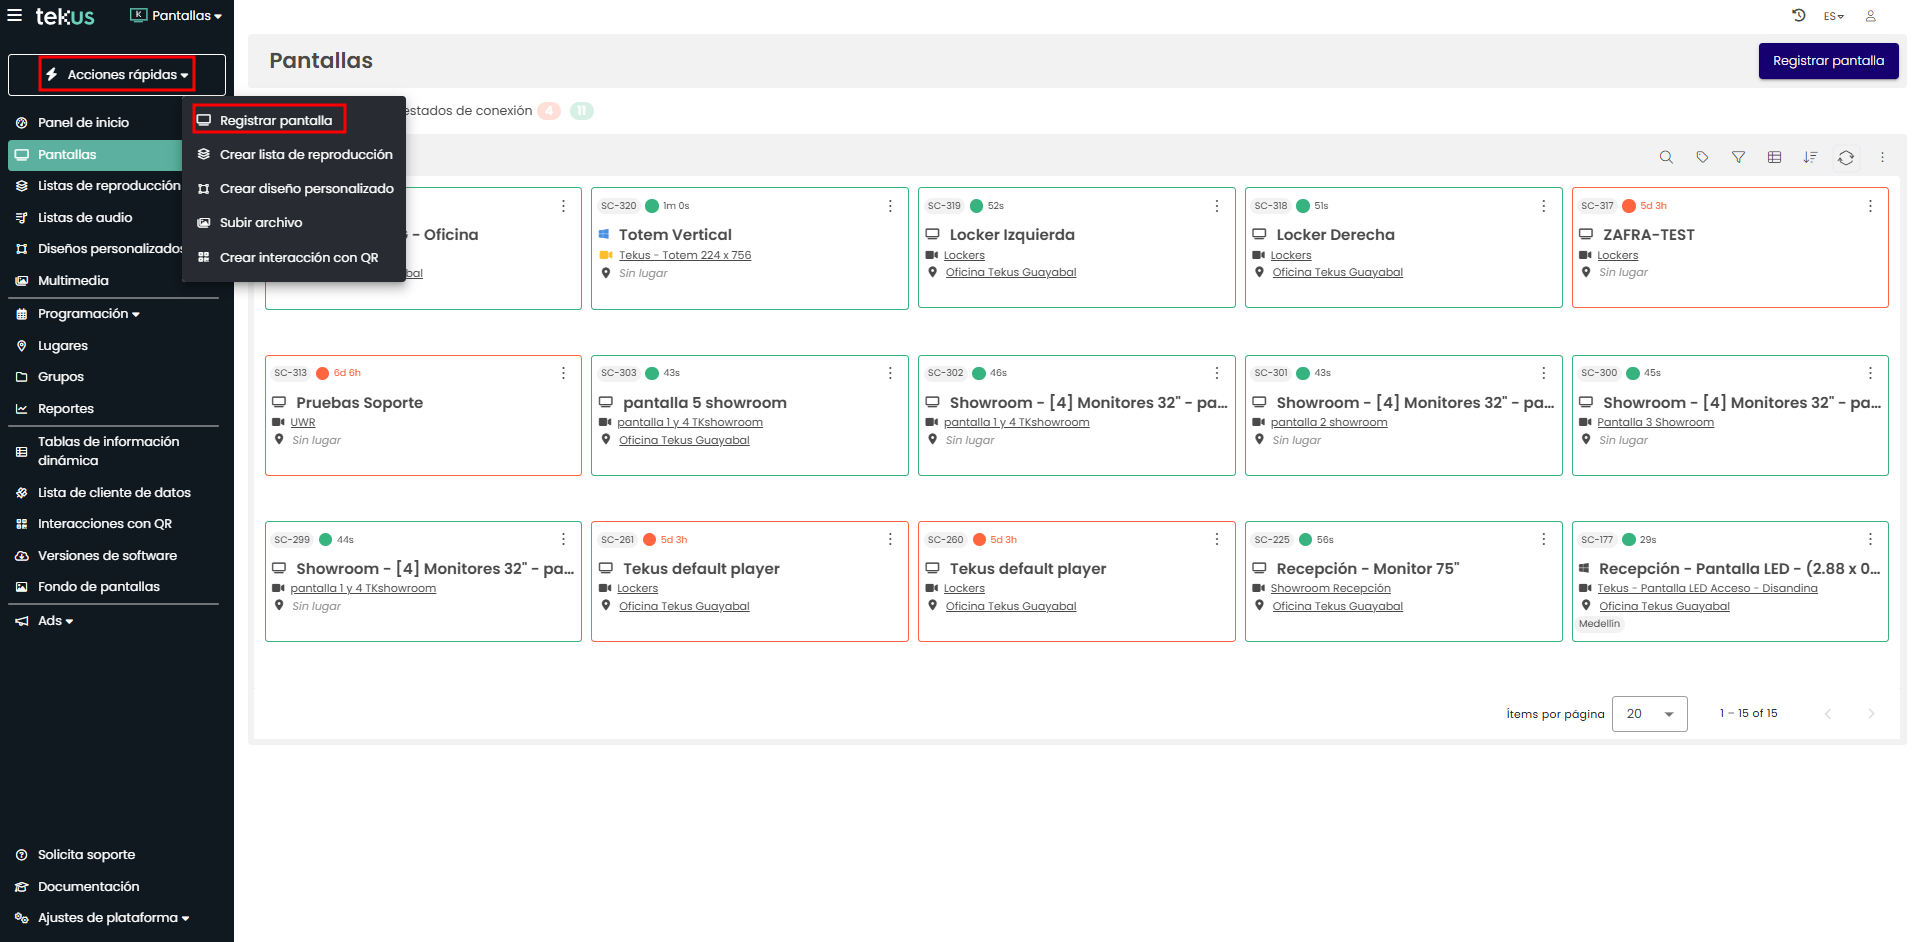
-
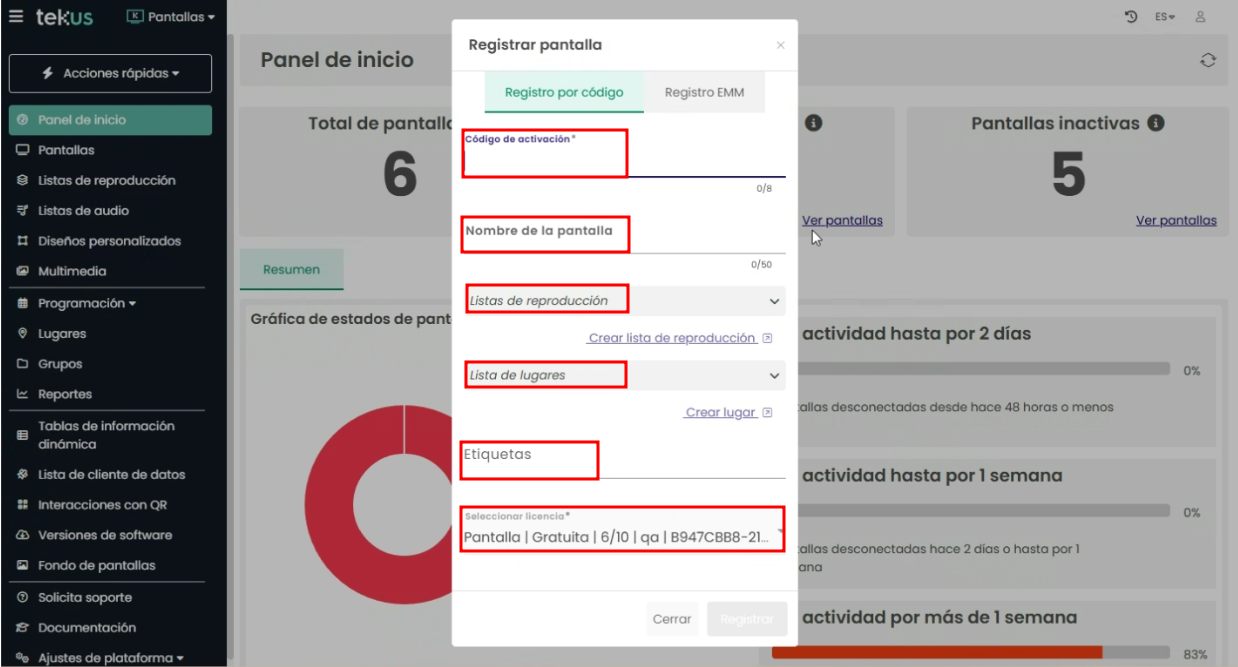
Now in the Register screen window, you must fill out the fields with the information we request as follows:
a. Activation code. It corresponds to the code displayed on your screen.
b. Screen name. In this field, you must assign a name to your screen or player that will help you identify its location or use. In our case, for example, we will put “Recepción”
c. Playlist. (formerly known as channel) In this field, you must select the playlist you want to broadcast on the screen you are registering. It is recommended to have the playlist created before you register the screen.
d. List of places. This is an optional field. It is used to define whether the screen belongs to a previously created place (store, office, warehouse, factory, etc.) or a new one.
e. Labels. This is an optional field. It is of great help to categorize the future search for related screens. For instance, if we have 5 screens registered, and we use the Test label on two of them, even though they have different names, searching for that label will show you both screens.
f. Select license. You must define whether you are going to register your screen with a free, demo, commercial or laboratory license. Tekus is the one who enables the license types, but in general the commercial license is used.
-
Now you must click to “Register”.
-
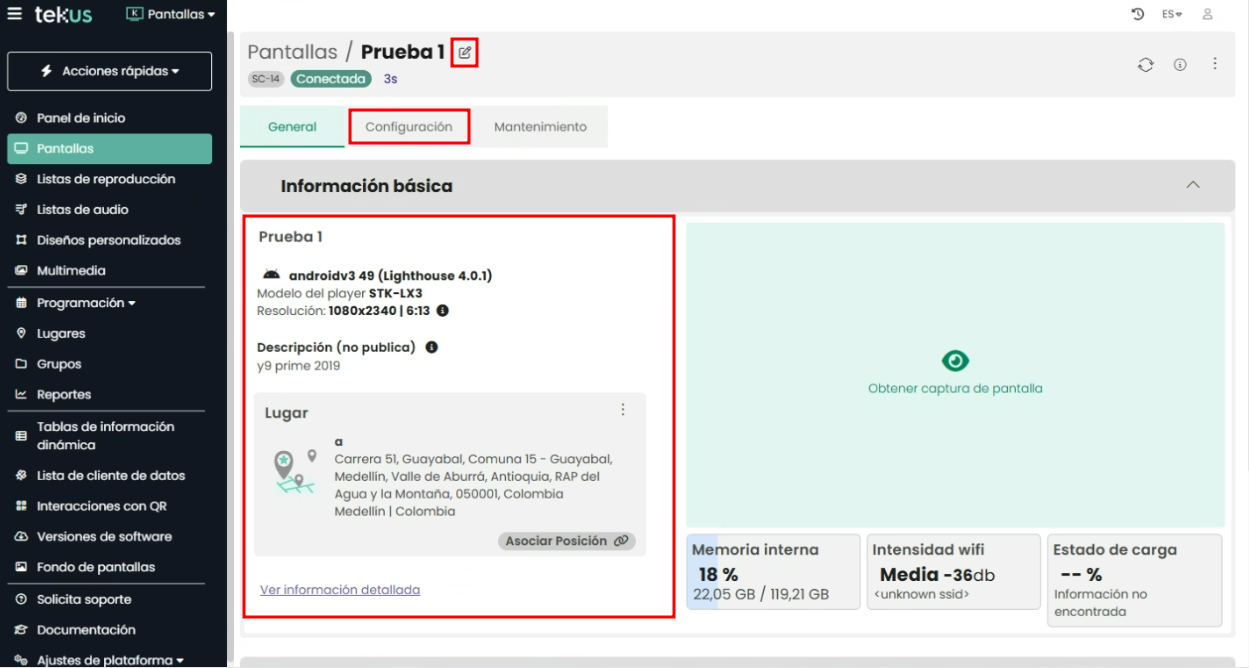
Immediately the registration ends, the editing screen will open, where you can modify the information defined at the beginning (name, tags, playlist, among others) or enable some settings according to your preference. As soon as you have validated that the information is correct, you must click on the Save button.
Si tienes algún requerimiento de soporte comunícate con nosotros a través de www.tekus.co/soporte.
Aviso Legal
Copyright © Tekus S.A.S 2026. Todos los derechos reservados.
El presente documento no podrá ser reproducido ni transmitido de ninguna forma ni por ningún medio sin el consentimiento previo otorgado por escrito de Tekus S.A.S y sus filiales.
El producto que se describe en este manual puede contener software cuyos derechos de autor pertenecen a Tekus S.A.S y a sus posibles licenciantes. Los clientes no podrán reproducir, distribuir, modificar, descompilar, desarmar, decodificar, extraer, ceder ni arrendar dicho software de ningún modo, como tampoco practicar ingeniería inversa, ni otorgar una sublicencia de este, salvo en aquellos casos en que la ley aplicable prohíba dichas restricciones o que dichas acciones hayan sido aprobadas por los titulares de los derechos de autor respectivos.